⬇️ Prefer to listen instead? ⬇️

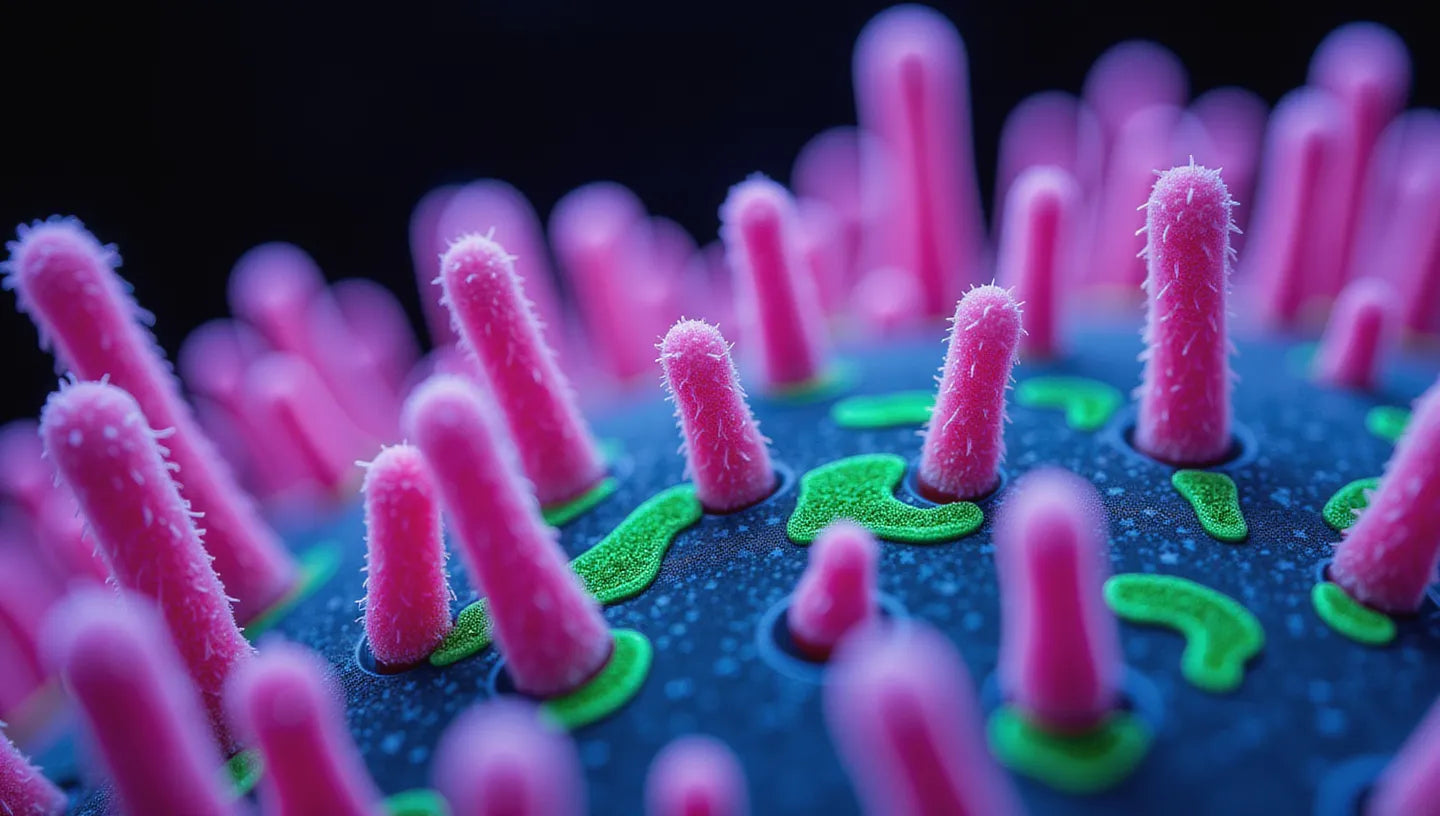
- 🔬 Hyphal pegs are tiny tufts important for telling similar mushroom species apart.
- 🍄 A proper lamellae cross section under a microscope shows key fungal parts for accurate ID.
- 🧪 Stains like Congo Red and Melzer’s reagent make hyphal pegs easier to see under a microscope.
- ⚠️ Mixing up hyphal pegs with cystidia or basidia can lead to wrong species identification.
- 🌱 Mushrooms from home grow kits make good samples for practicing fungal microscopy.

Understanding Hyphal Pegs in Fungal Microscopy
If you want to get good at identifying mushrooms, you need to look closer. While shape, color, and habitat help narrow down a species, correct fungal ID often depends on microscopic structures. Hyphal pegs are one of these hidden features, and they can make the difference between a correct and incorrect identification. Whether you enjoy mushrooms as a hobby, forage in the wild, or grow them at home in Mushroom Grow Bags or a Monotub, learning to recognize these tiny structures deepens your understanding of how fungi function and how species differ.

What Are Hyphal Pegs?
Hyphal pegs are tiny groups or tufts of hyphae. These are the thread-like cells that make up the mycelium and body of a mushroom. These formations stick out from the surface of a mushroom's hymenium, especially in gilled fungi. Basidia are structures that make spores, and cystidia are sterile cells. Unlike the neat arrangement of basidia and cystidia, hyphal pegs are not as orderly. They often look fuzzy or woolly when seen through a microscope.
A hyphal peg is a group of tightly packed hyphal strands. These strands often go straight up from deeper tissue layers. They may seem small to the naked eye or under low magnification. But they are very helpful for mycologists who need to identify fungi correctly.
And, hyphal pegs often come out of the subhymenial or hymenial layers. They reach just past the tissue that makes spores. Their structure is like general hyphae, but they grow in clusters. This makes them useful for identification. Their presence or absence can tell apart different genera. They can even tell apart species within the same genus. This is true for families like Russulaceae or Basidiomycota.

Where to Look for Hyphal Pegs
Hyphal pegs are most often found on the surface of the gills. Look right on the gill face or edge of the lamellae. In some species, they appear here and there along the gill face. But in others, they may form thicker clumps near the gill edge or margin.
Best Conditions for Seeing Them
Hyphal pegs are delicate and can break down. So, it is important to use samples that are:
- Fresh or recently picked: This means the microstructures stay whole.
- Clearly structured: Do not use samples with damaged or worn gills. Such gills can hide the hyphal setups.
- Minimally handled: Touching them too much can crush delicate surface parts.
When you use well-kept samples, you will have a better chance of seeing pegs early in your microscopy work.

How a Lamellae Cross Section Shows Hyphal Pegs
Making a lamellae cross section is the usual way to show the inner gill tissue under a microscope. This method lets you see many layers of the gill. Hyphal pegs are in these layers.
Learning About Gill Parts
When you slice through the gill from side to side, you see several layers:
- Hymenium: This is the outer tissue. It has basidia and cystidia. Hyphal pegs also come out from this area.
- Subhymenium: This is a supporting area. It has the base of reproductive and sterile cells. Often, the clustered hyphae that form the pegs start here.
- Trama: This is the inner core or flesh of the gill. It is made of hyphae that are more loosely arranged.
Hyphal pegs often start their upward growth at the point where the subhymenium and hymenium meet. If they are there, these pegs will rise above the surrounding hymenial surface. You can easily mistake them for something else if you do not know what to look for.
Tips for Good Sectioning
To see them well:
- Use a clean, sharp razor or scalpel blade. Dull tools will crush, not slice.
- Cut straight down through the lamellae. Make the slice as thin as possible.
- Put the cross section on a microscope slide. Use water or a staining solution.
- Carefully put a glass cover slip on top. This reduces pressure on the sample.
- Look at the edge of the gill and the middle face. You might see different peg activity in these areas.
Good cross-sectioning not only shows hyphal pegs. It also helps you check other identifying parts across the gill’s vertical view.

Tools You’ll Need to Identify Hyphal Pegs
To see tiny fungal parts well, you need the right tools. Fungal structures like hyphal pegs are very small. So, clear views, exactness, and good contrast are important.
Key Tools for Seeing Hyphal Pegs
-
Compound Microscope (100x–400x magnification):
- A good microscope is needed.
- Hyphal pegs usually look best at 200x to 400x magnification.
-
Stains and Reagents:
- Congo Red sticks to cell walls, which adds color contrast.
- Melzer’s reagent shows amyloid or dextrinoid reactions in fungal structures.
- You can also try KOH (potassium hydroxide) to make tissue clear. This helps you see better.
-
Dissecting Tools:
- Razor blade or scalpel for making exact cross sections.
- Tweezers for holding delicate tissue samples.
-
Microscope Slides & Cover Slips:
- Glass slides and slips are normal for mounting.
-
Lighting Accessories:
- Adjustable stage lighting or outside light sources for better contrast.
- Sometimes, side lighting can make surface structures stand out more.
-
Documentation Tools:
- Journals or drawing pads for writing down what you see.
- Phone adapter mounts or USB microscopes for taking pictures of your finds.
You can also use agar petri dishes and home grow kits. These give you fresh samples that are good for practice.

Step-by-Step: Spotting Hyphal Pegs Under the Microscope
Starting with microscopy can seem hard. But finding hyphal pegs is possible with patience and a clear method.
How to Get Started
- Select a Good Specimen: Pick a fresh cap with gills that are not broken.
- Slice a Lamella Cross Section: Make it thin and clean.
- Add Moisture or Stain: Mount with a water drop or reagent.
- Place Cover Slip Gently: Do not crush the sample.
- Begin Observation at 100x: Find the main parts of the mushroom.
- Zoom to 400x: Focus on smaller details, especially near the hymenial layer.
- Adjust Lighting and Aperture: Contrast and shadow can help show projections better.
- Draw or Photograph Your Findings: This makes comparing different species easier.
What to Look For
- Fuzzy or thin patches coming straight out from the gill surface.
- No spore-bearing parts in the same cluster. This helps tell pegs from basidia.
- Messy arrangement compared to the more straight setup of basidia.

Fungi That Commonly Display Hyphal Pegs
Hyphal pegs do not appear the same way in all fungi. They can be very specific to certain genera or species. Their presence often goes with certain changes over time or specific natural places.
Common Genera with Hyphal Pegs
-
Russulaceae Family
- This includes Russula and Lactarius species.
- People often use these for looking at hyphal pegs.
-
Basidiomycota Species
- Especially in gilled mushrooms like Gymnopus, Entoloma, and Mycena.
-
Saprobic Fungi
- These fungi break down wood or dead leaves. They may show clear pegs because their hymenial arrangements are denser.
-
Lignicolous Fungi
- Species that grow on wood often have tougher tissue. This helps keep pegs in better condition.
Keep this in mind: Not finding hyphal pegs does not mean a genus is ruled out. But finding them can greatly narrow down your choices when identifying fungi. This is true especially in large groups.

Why Hyphal Pegs Matter in Mushroom ID
You might ask: are a few tiny threads truly important? Yes, they are.
How They Help Identify Fungi Correctly
-
Telling Apart Look-Alikes:
- For example, two Russula species may look the same to the naked eye. But only one will have pegs.
-
Adding to Other Microscopic Traits:
- You use them with spore prints, basidia shape, and cystidia presence. All these details together help with ID.
-
Clearing Up Unclear Field Marks:
- Things like cap color and gill spacing change with age and the environment. But pegs are more steady.
-
Making Dichotomous Keys Better:
- Microscopic keys often depend on hymenial structure. Hyphal pegs become important parts of these keys.
Even hobby foragers should think about pegs. They help tell edible from toxic kinds. Also, they are good for field notes for later use.

Common Mistakes to Avoid
Like all microscopy, learning to look at hyphal pegs takes time. Mistakes can slow your discoveries or lead to wrong identifications.
Key Problems
-
Confusing Cystidia with Pegs:
- Cystidia are often bigger, more special, and stand alone.
- Hyphal pegs are thicker tufts with similar strands.
-
Using Low Magnification:
- Under 100x, most pegs are too small or blurry. This makes your check incomplete.
-
Not Staining Right:
- Tissue may blend under normal light. Stains make parts clearer.
-
Bad Sectioning:
- Slices that are too thick or cut at an angle will miss the hymenial setup where pegs are.
-
Not Checking Many Samples:
- One sample might not have pegs because of age or damage. Always compare across samples.

When You Can’t Find Hyphal Pegs
If you do not see pegs, it does not always mean they are not there. Some small changes can give better results.
Troubleshooting Tips
-
Recheck the Sectioning:
- Was the cut too thick, or not straight down through the gill?
-
Try High-Contrast Stains:
- Congo Red or Melzer’s can make the edges of structures clearer.
-
Adjust Illumination:
- Side-lighting or a darker background can make shadows deeper and help you see better.
-
Look at Many Gill Regions:
- Pegs might be more visible near the gill edge or margin.
-
Test a Different Sample:
- Wild mushrooms can vary a lot in peg growth between different stages of life.

Grow-At-Home Fungi and Micromorphology
People who grow mushrooms at home are in a good spot to learn about tiny parts hands-on. With fresh samples all the time, you can get the most from looking at structures like hyphal pegs.
Benefits of In-House Microscopy
-
Strain Differentiation:
- Some cultivated mushrooms like Lions’ Mane or Oysters show small differences in their tiny structures.
-
Contaminant Detection:
-
Educational Practice:
- Growing at home gives you many steady samples. These are good for regular microscopy practice.
Zombie Mushrooms’ grow kits are very useful. They make reliable and healthy samples. These are perfect for new microscopists who want to identify fungi using advanced ways, like looking for hyphal pegs.

From Field Foraging to Fungal Learning
Microscopy connects looking for mushrooms in the wild with studying them in a lab. It turns simple interest into careful study.
Getting a Better Understanding of Fungi
-
Field Notes and Journaling:
- Keep track of hyphal pegs in different places and types of mushrooms.
-
Sketching What You See:
- Drawing helps you remember and get better at seeing small features.
-
Photographic Records:
- Use digital tools to save pictures of pegs you find. You can compare them later.
-
Joining Mycology Groups:
- Share your peg pictures. Get help with identification or learn with others.
When you connect the wild outdoors with the microscopic world, you truly learn about fungi. This goes far beyond just identifying them by eye.
Should You Add Hyphal Pegs to Your ID Toolbox?
If you want to get better at identifying fungi, learning to spot hyphal pegs is truly worth it. They are small, technical, and often missed. But they are very reliable features that improve any identification session.
From amateur naturalists to experienced collectors, using a microscope to identify fungi—especially hyphal pegs—can mean you go from guessing to being sure. When you use good tools and practice samples, like those from Zombie Mushrooms, the microscopic world of fungi becomes easy to access and very rewarding.
Citations
Largent, D.L., Johnson, D., & Watling, R. (1977). How to Identify Mushrooms to Genus I: Macroscopic Features. Mad River Press.
Kirk, P.M., Cannon, P.F., Minter, D.W., & Stalpers, J.A. (2008). Dictionary of the Fungi (10th ed.). CABI Publishing.
Mueller, G.M., Bills, G.F., & Foster, M.S. (2004). Biodiversity of Fungi: Inventory and Monitoring Methods. Elsevier Academic Press.

