⬇️ Prefer to listen instead? ⬇️

- 🍄 Monotubs can produce large harvests from a single container, making them one of the most cost-effective indoor methods.
- 🧪 Agar cups let you test and expand clean cultures cheaply, reducing contamination and wasted grows.
- 💼 Grow bags offer a beginner-friendly, all-in-one setup that’s affordable and space-saving.
- 💧 Mushrooms thrive with steady humidity and airflow—both monotubs and grow bags make this easy.
- 📈 Using the right low-cost tools means fewer failed grows, more consistent results, and better value for every dollar spent.
Grow Mushrooms at Home Without Breaking the Bank
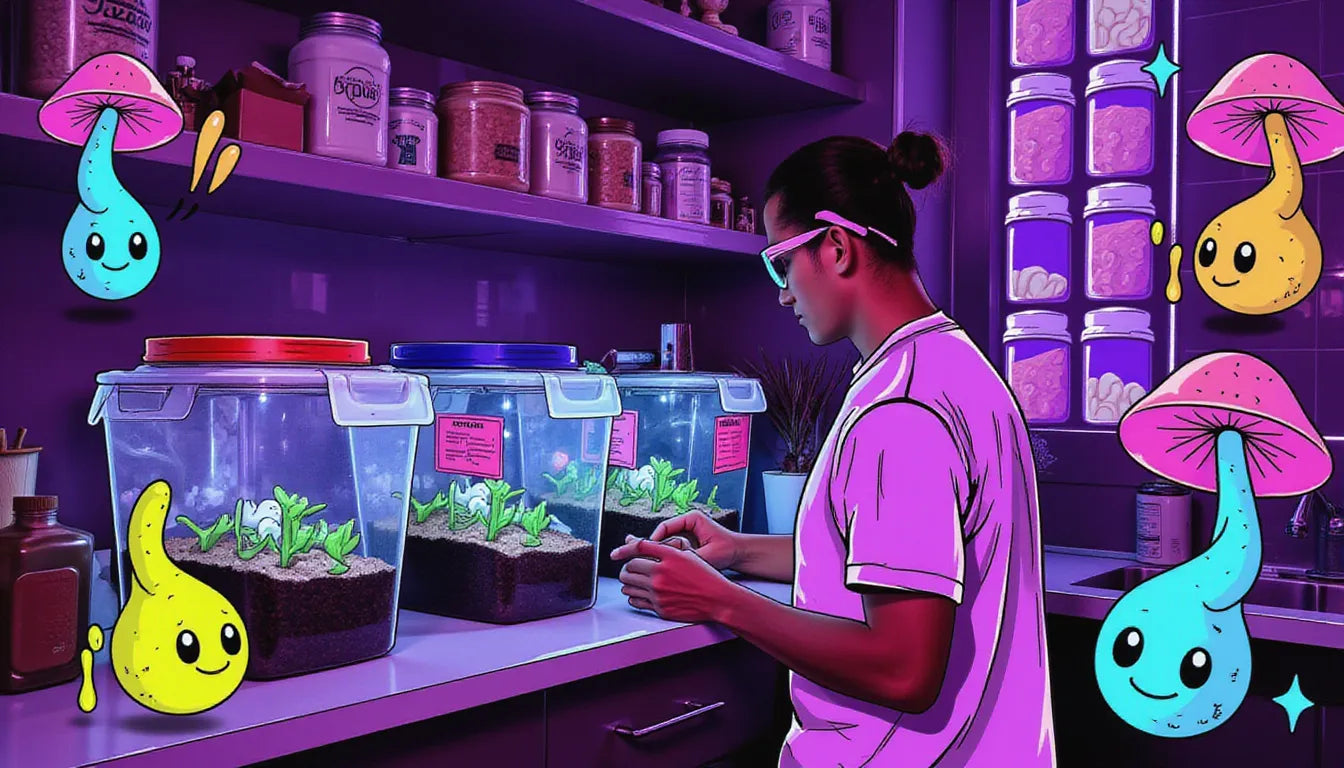
You don’t need expensive lab setups or commercial equipment to get reliable mushroom harvests. With the right low-cost tools—like monotubs for fruiting, agar cups for testing cultures, and grow bags for all-in-one inoculation and colonization—you can achieve professional-level results at home. These methods keep contamination low, yields high, and costs manageable, making mushroom cultivation affordable for both beginners and experienced growers.
🍄 Mushroom Growing Basics: What You Need to Know
Successful mushroom cultivation boils down to three essentials: a nutritious substrate, proper humidity and airflow, and clean inoculation techniques. Monotubs, agar cups, and grow bags are designed to streamline each step, removing much of the trial-and-error that wastes time and money.
Key needs for mushroom cultivation:
-
Clean cultures: Start with agar cups to test and isolate strong mycelium.
-
Efficient colonization: Use grow bags with filter patches to keep the substrate protected.
-
Controlled fruiting: Move to a monotub setup for consistent airflow, humidity, and high yields.

Method 1: Monotubs — Big Yields in One Affordable Container
Monotubs are one of the most cost-effective setups for indoor mushroom cultivation. With a single plastic tub fitted with filtered holes for airflow, you can create a controlled environment that produces multiple flushes from the same substrate. Unlike buying many small kits, a monotub lets you scale up at low cost while keeping conditions stable for your mushrooms.
How to Use a Monotub
-
Line your tub with a plastic liner or bag to help with moisture control.
-
Fill with a bulk substrate such as CVG (coco coir, vermiculite, gypsum).
-
Add your colonized grain spawn, mix evenly, and level the surface.
-
Close the lid and allow the mycelium to colonize fully.
-
Once colonized, adjust fresh air exchange by loosening filters or slightly cracking the lid, and mist if needed.
This simple process lets one container act like a full grow room, without expensive equipment.
Best For
-
Growers who want large yields without investing in a greenhouse setup.
-
People with limited indoor space—monotubs fit neatly in closets, basements, or spare rooms.
-
Budget cultivators who want to maximize production from each run.
Mushroom Types
- Oyster mushrooms: Quick to fruit, adaptable, and come in colorful varieties like pink, yellow, and blue.
- Lion's mane: Has brain-boosting compounds and a seafood-like texture—popular for home cultivation.
These monotubs are available from suppliers like Zombie Mushrooms, offering convenient delivery and beginner-friendly instructions.

Method 2: Agar Cups — Low-Cost Culture Testing and Expansion
Agar work is often seen as advanced, but agar cups make it affordable and beginner-friendly. Instead of investing in a full lab setup, agar cups let you isolate healthy mycelium, check for contamination, and expand clean samples for grain spawn—all at a fraction of the cost. By starting with agar cups, growers save money in the long run by preventing wasted substrate or failed bags.
How to Use Agar Cups
-
Inoculate the agar surface with spores or a tissue sample under clean conditions.
-
Seal and store the cup at room temperature or slightly warmer.
-
After 5–10 days, check for clean, white mycelium growth.
-
Transfer healthy sections to grain spawn bags or liquid culture.
This simple process ensures you’re only working with strong and contamination-free cultures before committing to bigger grows.
Why It Works
-
Agar acts as a nutrient-rich medium where mycelium grows visibly.
-
Contaminants (like mold or bacteria) show up early, making them easy to spot.
-
By only transferring healthy mycelium, you protect larger investments like grow bags or monotubs.
Best For
-
Beginners learning sterile technique without needing petri dishes or pressure cookers.
-
Growers who want to stretch one spore sample into many grows.
-
Anyone looking to cut costs by reducing wasted bags or tubs.
Mushroom Types
Agar cups are versatile and work with nearly all mushrooms, including:
-
Oysters (Pleurotus spp.)
Basically, any species you want to cultivate can benefit from clean agar starts.

Method 3: Grow Bags — Simple, All-in-One Budget Solution
Mushroom grow bags are one of the easiest and most affordable ways to get started. Each bag contains sterilized substrate sealed with a filter patch for airflow, meaning beginners don’t need extra equipment. Just inoculate, wait for colonization, and fruit directly in the bag or transfer to a monotub later. Because they’re compact and low-maintenance, grow bags are ideal for small spaces or anyone starting out on a budget.
How to Use Grow Bags
-
Inoculate the bag with liquid culture or agar transfer.
-
Seal the injection site and store the bag in a clean area.
-
Let the mycelium fully colonize the substrate (usually 2–4 weeks).
-
Once colonized, cut an X-shaped slit in the bag or open the top for fruiting.
-
Mist lightly and maintain airflow until mushrooms mature.
Benefits
-
Low-Cost Entry Point: No extra gear or tools required.
-
Compact Size: Fits in closets, shelves, or under counters.
-
Reusable Approach: Empty and refill bags with new substrate for additional grows.
-
Scalable: Start with one or two, then expand to multiple bags for larger harvests.
Best For
-
First-time growers who want a reliable, no-fuss method.
-
Indoor cultivators working with limited space.
-
Gardeners who want to experiment without setting up a full monotub or greenhouse.
Mushroom Types
Grow bags are versatile and can be used for:
-
Oysters (Pleurotus spp.)
-
Lion’s Mane (Hericium erinaceus)
-
Reishi (Ganoderma lucidum)

Essential Tools and Supplies for Cost-Effective Growing
Even budget-friendly mushroom growing works better with a few key tools:
-
Monotub or Grow Bags: These act as your main cultivation space, reducing the need for multiple small containers.
-
Agar Cups: Inexpensive but powerful for testing cultures before committing them to substrate.
-
Spray Bottle or Misting Tool: Keeps humidity levels steady without overwatering.
-
Gloves and Alcohol Wipes: Low-cost hygiene tools that prevent contamination.
By focusing on tools that directly reduce contamination or maximize yield, you spend less over time while getting more mushrooms from each cycle.
Mistakes to Avoid When Growing Mushrooms Cheap
Trying to cut costs can sometimes backfire. Watch out for these common pitfalls:
-
Skipping Cleanliness: Not sterilizing or using agar cups to check cultures often leads to wasted bags or tubs.
-
Overwatering: Too much misting in a monotub or bag can cause contamination.
-
Wrong Substrate Choice: Using poor-quality or unsterilized substrate quickly cancels out any cost savings.
-
Starting Too Big: New growers save more by beginning with one grow bag or monotub instead of spreading resources too thin.
Avoiding these mistakes ensures your low-cost approach actually saves money in the long run.

Additional Tips for Budget Success
-
Reuse Wisely: Clean monotubs and tools between grows instead of buying new ones.
-
Work Small, Scale Later: Start with one grow bag or agar cup test before committing to bigger setups.
-
Control Environment: Even cheap setups benefit from steady humidity and indirect light.
-
Track Your Costs: Keep notes on yield per grow bag or tub—you’ll see which methods truly save money.
These small adjustments help you stretch every dollar while keeping harvests consistent.

Cutting Costs Without Cutting Corners
One of the biggest challenges for new growers is balancing budget with success. Trying to skip steps or use poor materials often leads to contamination and failed grows—which ends up costing more in the long run. Instead, smart investments like agar cups for clean cultures, grow bags for simple fruiting, and monotubs for scaling up actually save money by reducing wasted time and substrate. Growing mushrooms on a budget doesn’t mean going cheap on essentials—it means choosing tools that give you the best return per harvest.

FAQ: Cost-Effective Mushroom Growing
Q: Are monotubs worth it for beginners?
A: Yes. Monotubs are one of the most budget-friendly ways to create a proper fruiting chamber. They maintain humidity and airflow without needing expensive automated systems.
Q: Why use agar cups instead of spore syringes?
A: Agar cups let you test and select clean mycelium before expanding it. This reduces contamination and saves money in the long run since you won’t waste substrate on weak or dirty cultures.
Q: How do grow bags help save costs?
A: Grow bags combine sterilized grain and substrate in a sealed environment with filter patches, cutting down the need for multiple containers. They make colonization cleaner and more efficient, reducing failed grows.
Q: Can I grow mushrooms at home without special equipment?
A: Absolutely. With just agar cups for starting cultures, grow bags for colonization, and a monotub for fruiting, you can grow gourmet mushrooms from start to finish at home without breaking the bank.
When to Expect Results and Harvest Timeframes
When to Expect Results and Harvest Timeframes
How fast mushrooms fruit depends on your setup:
-
Grow Bags: Typically colonize in 2–4 weeks and fruit shortly after.
-
Monotubs: May take 3–5 weeks before pins appear, but they often yield multiple flushes over several months.
-
Agar Cups: Not for direct harvest, but they speed up the process by ensuring clean cultures before you move to bags or tubs.
By combining agar cups with bags or monotubs, growers avoid failed attempts and shorten the path to consistent harvests. With good conditions, you can expect your first flush in just a month, making this one of the fastest, most cost-effective crops to grow at home.
Yes—Mushroom Growing Can Be Cheap and Easy
Mushroom growing has a reputation for being complex, but with the right approach, it’s one of the most affordable hobbies you can start. Monotubs, agar cups, and grow bags simplify the process by reducing wasted materials and giving you more mushrooms per dollar spent.
Whether you’re working from a small apartment or a garage, these tools prove that you don’t need expensive labs or fancy gear to get real results. With steady care and simple methods, mushroom growing is not only cheap—it’s sustainable, rewarding, and accessible to anyone.
Start small. Stay curious. And if you’re ready to grow mushrooms the simple, affordable way, visit Zombie Mushrooms to find grow kits, spawn options, and community resources made just for home mushroom gardeners.
Citations:
- Royse, D. J., Baars, J., & Tan, Q. (2017). Current overview of mushroom production in the world. In Edible and medicinal mushrooms: Technology and applications (pp. 5–13). Wiley-Blackwell.
- Stamets, P. (2000). Growing gourmet and medicinal mushrooms. Ten Speed Press.
- Chang, S. T., & Miles, P. G. (2004). Mushrooms: Cultivation, nutritional value, medicinal effect, and environmental impact. CRC Press.

