⬇️ Prefer to listen instead? ⬇️
- 🍄 Instant Pot reaches ~11 PSI, good for small-batch mushroom substrate sterilization. But it is not fully FDA-compliant.
- 🔥 Double sterilization cycles in the Instant Pot greatly reduce contamination risks.
- 🌾 Pasteurizing straw or coco coir using the "Keep Warm" or "Sous Vide" function works well for oyster mushrooms.
- 🏡 Instant Pot mushroom cultivation helps urban and beginner mycologists who have limited space and equipment.
- 🌡️ Summer growing conditions need temperature control to avoid contamination or stopped mycelium growth.
Instant Pot Mushroom Cultivation: Is It Effective?
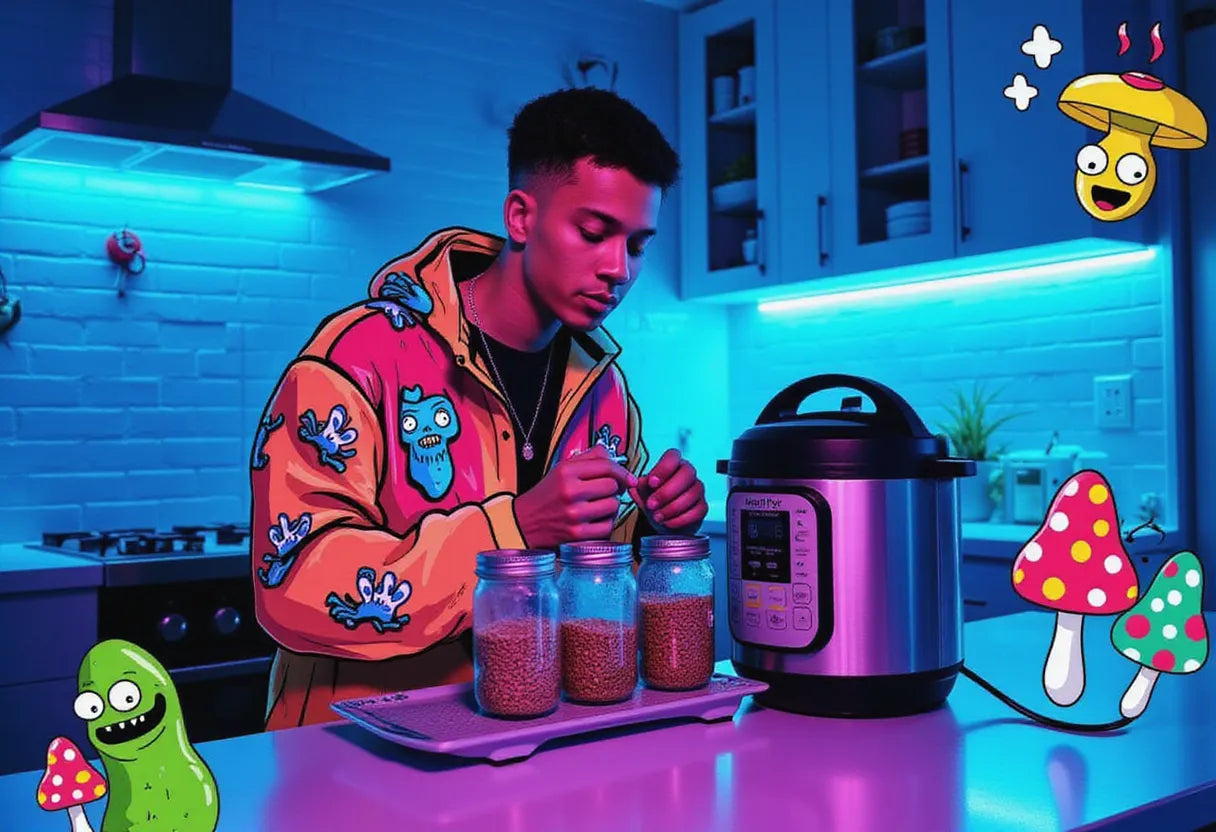
Instant Pot mushroom cultivation is a rising trend in the home mycology world. It offers hobbyists and new growers a compact, multi-use way to prep growing media without buying expensive equipment. You can sterilize grain spawn jars or pasteurize straw and sawdust. The Instant Pot helps make small-scale grows easier from your kitchen countertop. Let’s look at what makes this household appliance a good tool for mycology. We will also see how to use it to grow tasty mushrooms like blue oysters and lion’s mane at home. Our mushroom grow bags work great with Instant Pot sterilization methods, giving you a clean, ready-to-use environment for reliable harvests

What Can—and Can’t—You Do with an Instant Pot for Mushroom Cultivation?
The main reason to use an Instant Pot for mushroom cultivation is that it can create pressure cooking environments. These are like those of stovetop pressure canners. An Instant Pot typically reaches about 11 PSI on its high-pressure setting. This is enough to kill many—but not all—microbes that can cause contamination in grain jars or bulk substrates.
✔️ What It Can Do:
- Pasteurize substrates like straw, coco coir, or manure-based mixes. It does this by keeping them at 145–165°F.
- Sterilize hydrated grain jars well for many species when you run long and repeated cycles.
- Process sawdust mix blocks meant for medicinal or gourmet mushrooms.
- Incubate and hydrate substrates using controlled temperature settings like "Keep Warm" and "Sous Vide."
❌ What It Can't Do:
- Reach FDA-standard sterilization of 15 PSI for 90 minutes. This is needed for lab-grade sterilization [Stamets, 2000; USDA, n.d.].
- Handle large amounts, as its inside space holds at most 2–3 pint jars per session.
- Replace sterile technique. So, filter lids, SABs (Still Air Boxes), or laminar flow hoods are still needed.
If you grow mushrooms at home and do not need commercial-level output, these limits are okay. This is especially true with some simple methods like repeating cycles for better sterilization.
Choosing the Right Instant Pot for Mycology
Not all Instant Pots are the same for mushroom cultivation. For good mushroom sterilization methods with an Instant Pot, the size, settings, and ease of use matter more than you might think.
🔍 Ideal Features:
- Size Matters: An 8-quart or larger model is key. Smaller models (6-quart or under) often do not have enough height for jars. They also struggle to keep temperature with larger substrate bags.
- Programmable Settings: Look for a model with "Pressure Cook," "Sterilize," "Sous Vide," and manual time/temperature controls. These features allow for many uses across sterilization and pasteurization jobs.
- Removable Trivets and Inserts: These lift your jars above the water. They also stop jars from touching the heating element directly.
🛠️ Configuration Hacks:
- Angled Jar Placement: Taller jars (like wide-mouth quarts) can sometimes fit on a slant inside the pot. Wrap them in foil to stop water from getting in.
- Stacking: Use a trivet extender or metal rack to stack more layers when you can. This increases the amount you can process.
Buying a larger model helps make your setup useful for longer. And it lets you try different substrate types and growing containers.

How to Sterilize Grain Jars Using an Instant Pot
Sterilizing grain spawn is a key step in mushroom cultivation. Instant Pot methods for growing mushrooms are not lab-grade. But many home growers report high success rates by using a double-cycle technique.
🧂 What You’ll Need:
- Pint or half-pint Mason jars
- Hydrated grains (rye, millet, or oats)
- Lids with breathable microfilter patches and injection ports
- Aluminum foil, trivet or rack, and 1–2 inches of water in the pot
🔬 Sterilization Steps:
- Hydrate Your Grain: Soak and boil grains. Do this until they have absorbed water but are not soggy. Drain them well to reduce inside moisture.
- Fill and Seal: Loosely fill jars with grains. Leave room for gas exchange. Secure the lid with the filter port and cover with aluminum foil.
- Load and Cook: Place jars on a trivet above 1–2 inches of water. Set to "Pressure Cook" on high and cook for 90 minutes.
- Cool and Repeat: Wait for pressure to release naturally. Cool slightly. And then run a second 90-minute cycle to make up for lower PSI levels.
- Cool Fully Before Use: Let your jars get to room temperature. Do this before adding spores or cultures. This avoids sudden temperature changes.
This double-batch method has proven good for personal grows. It also lowers contamination risks common with less than ideal sterilization.

Pasteurizing Mushroom Substrates in the Instant Pot
Pasteurization is a less strong treatment than sterilization. It does not kill all microbes. Instead, it weakens competing microbes while keeping helpful ones. The result is a substrate ready for fast colonizers. This works well outdoors or in non-sterile places.
Suitable Substrates:
- Straw (chopped or shredded)
- Coco coir and vermiculite (often used in PF Tek)
- Aged manure (for species like agaricus)
- Coffee grounds mixed with bulk filler
Step-by-Step Pasteurization Guide:
- Prepping the Substrate: Moisten the material to "field capacity." Squeeze it, and only a few drops of water should come out.
- Bag or Wrap: Put it in a pillowcase or synthetic filter bag. Seal it loosely to let water flow.
- Settings: Use "Sous Vide" or "Keep Warm" to keep the inside water temp between 145°F to 165°F.
- Hold for 60–90 Minutes: Longer times make sure heat gets to the core. Use a digital thermometer for exactness.
- Dry and Cool: Drain extra water. And then let it cool fully before adding spores.
This gentle method makes large grows easier. This is especially true for blue oyster mushrooms, as their strong growth can take over slower competitors.
Growing Blue Oyster Mushrooms with Instant Pot Prep
Blue oyster mushrooms (Pleurotus ostreatus var. columbinus) grow well in settings prepped with simple home setups. Their strong mycelium colonizes fast. And they fruit strongly in well-aired places.
🔁 Cultivation Timeline:
- Grain spawn colonization: 10–14 days
- Substrate colonization: 7–10 days
- Fruiting body formation: seen within 5–7 days of fruiting conditions
Instant Pot-Supported Workflow:
- Sterilize Grain: Use the double-cycle method to prep pint jars.
- Pasteurize Substrate: Pasteurized straw in the Instant Pot using "Sous Vide" mode.
- Mix and Pack: Combine colonized grain spawn and cooled straw substrate in a clear grow bag or bucket with air holes.
- Fruiting Conditions: Keep humidity at 85–95%. Introduce indirect sunlight. And make sure air exchanges to avoid too much CO2.
Blue oysters are easy to grow because they are tough. This helps when you are getting grow-room temperature, humidity, and airflow right.
Lions Mane Mushroom Cultivation Using Instant Pot Techniques
Unlike oysters, lion’s mane (Hericium erinaceus) needs more sterility and the best substrate conditions. The fuzzy, pom-pom-like mushroom is a special food with much talk about its brain health benefits.
🧾 Best Practices:
- Substrate Prep: The best mix is 5 parts hardwood sawdust and 1 part wheat bran at field capacity moisture level.
- Container Choice: Quart jars or filter patch bags work well. They also fit within larger Instant Pots.
- Sterilization Method: Two 90-minute high-pressure cycles with natural pressure release and enough cooling time.
Colonization and Fruiting:
- Colonization happens in 2–3 weeks at ~70°F.
- Fruiting starts with high humidity (~90%) and indirect light.
- Keep conditions clean to avoid mold. Lion's mane is slower to produce first pins than oyster mushrooms.
Using the Instant Pot to sterilize lion’s mane substrate helps strong mycelium form without bacteria or fungi competing.

Making Sawdust Blocks with the Instant Pot
Sawdust substrate blocks are popular with home growers and commercial growers interested in gourmet mushrooms. You can make them using an Instant Pot. You just need to get the volume and temperature right.
Recipe:
- Ingredients: 5 parts hardwood sawdust, 1 part wheat bran, ~60% total moisture by weight.
- Mixing: Mix well. Make sure hydration is even throughout the substrate.
- Bagging: Load into small autoclavable grow bags (0.5–1.5 lbs substrate per bag) with filter patches. Seal.
- Sterilization: Use two full cycles. Each should be 90 minutes, high pressure, with natural release. This helps prevent contamination.
- Inoculate in Clean Zone: Add spawn in a SAB or under laminar airflow.
- Incubate: Store at 68–75°F in the dark for 2–3 weeks.
After colonization, move to fruiting conditions that match what your specific mushroom species needs.

Pros and Cons of Using an Instant Pot for Mushroom Growing
✔️ Pros:
- ✅ Easy to use and safe: Safer for beginners than stovetop canners.
- ✅ Affordable to start: Around $100–$150 depending on the model. Commercial pressure canners cost $300+.
- ✅ Many uses: Switch between cooking, canning, pasteurizing, sterilizing, and even making yogurt.
- ✅ Energy efficient: Uses less power than stovetop setups. And it does not heat up your kitchen during summer.
❌ Cons:
- ❌ Lower PSI: Only ~11 PSI. Full sterilization uses 15 PSI.
- ❌ Batch size: Often only 2–3 jars or one sawdust block per session at most.
- ❌ Takes time: Needs multiple long cycles per batch for assured cleanliness.
- ❌ Life span concerns: Repeated high-heat use could make the Instant Pot wear out faster.
Even with these limits, it is a good first step for new growers moving from spore syringes to spawn bags.
Hot Weather Tips for Summer Mushroom Growing
Summer can ruin even the best-planned grow project if you do not take steps early.
☀️ Cooling Tips:
- Choose heat-tolerant strains like Phoenix oyster and pink oyster. These fruit in warmer temperatures.
- Use cool spots like air-conditioned closets or insulated bins with frozen water bottles for incubation.
- Put off fruiting if home temperatures are over 80°F. Pause the process until conditions get better.
- Stop heat buildup by making colonization periods shorter. And switch to varieties that fruit faster.
Checking temperatures with laser IR thermometers or simple hygrometers helps you see overheating. This is before mushrooms stop growing or get contaminated.
Instant Pot mushroom cultivation offers a good balance between being easy to use and being effective. Traditional methods will still be common in commercial or lab setups. But this tool gives great worth for hobbyist growers. You can grow oyster mushrooms with pasteurized straw. Or you can grow lion’s mane blocks using sterilized sawdust. The Instant Pot can help you get strong, healthy mycelium colonies. It needs little money to start. And it gives you much room to try new things.
Citations:
Stamets, P. (2000). Growing Gourmet and Medicinal Mushrooms. Ten Speed Press.
USDA. (n.d.). Home Pressure Canning and Processing Guidelines. Retrieved from https://nchfp.uga.edu/publications/publications_usda.html
Cotter, T. (2020). The Mushroom Cultivator’s Guide.

