⬇️ Prefer to listen instead? ⬇️

- 🍄 Bucket pasteurization keeps over 75% of yields compared to full sterilization (Myers, 2020).
- 💧 Hydrated lime cold pasteurization cuts contamination by 60% (Rinehart, 2019).
- 🔥 Oven-based heat pasteurization works for sawdust and wood chip growing material.
- ♻️ Spent coffee grounds can grow oyster mushrooms when aged or mixed with other growing material.
- 🧫 Without pressure cookers, mushrooms like oysters and wine caps are best because they are strong.
Growing mushrooms at home doesn’t have to start with expensive gear. While pressure cookers are the gold standard for sterilizing mushroom substrate, they aren’t your only option. Several simple and effective methods—like hot water pasteurization, lime baths, or oven sterilization—can keep contaminants out and set your grow up for success. If you’re experimenting in your kitchen or running a small-scale project, these techniques are practical alternatives. And for growers who want to skip the risk and hassle, pre-sterilized mushroom grow bags offer the cleanest, most reliable way to start without a pressure cooker.

Why Sterilization Matters in Mushroom Cultivation
Importance of Contamination Control
Sterilization is the backbone of successful mushroom cultivation. Without it, bacteria, mold, and other fungi can quickly overtake your substrate, leaving little chance for healthy mushroom growth. Even small amounts of contamination can ruin an entire grow, wasting both time and resources.
Mycelium vs. Competing Microbes
Mushroom mycelium is strong but also vulnerable. While it thrives in clean, nutrient-rich substrates, it struggles to compete against aggressive contaminants like Trichoderma (green mold) or bacteria. Proper sterilization gives your mycelium a head start, ensuring it fully colonizes the substrate before competitors take hold.
Sterile Workflow Tools
Beyond the substrate itself, maintaining sterile workflow practices is equally critical. Essential tools include:
-
Gloves and alcohol wipes to keep your hands and surfaces clean.
-
Still air box or flow hood to reduce airborne contaminants.
-
Agar cups for testing cultures before expanding them.
Combining sterilization with a careful sterile workflow creates the clean foundation your mushrooms need to thrive.

What Can Go Wrong When You Don't Use a Pressure Cooker
Not using a pressure cooker means you take a bigger chance of contamination. Molds, bacteria, and other fungi can grow faster than your chosen mushroom type. This will ruin your work. Growing material with contamination often looks discolored (green, black, pink). It can also smell bad or grow fuzzy things that are not mushroom mycelium. This can cause:
- The mushroom culture not growing
- Time and materials wasted
- Possible health problems if bad molds spread
Even with these risks, growing mushrooms without a pressure cooker is possible. And you can grow a lot of them if you are careful. Good results come from three key steps:
- Pick the right growing material: Ones that only need pasteurization.
- Grow strong mushroom types: Especially those that grow fast, like oyster mushrooms.
- Use clean and careful methods: Work in clean places, clean hands and tools, and store materials correctly.
If you control your growing area and start with cleaner items, you greatly lower the risk of contamination. This is true even without full sterilization.

Best Growing Materials for Growing Without a Pressure Cooker
The key to growing mushrooms without a pressure cooker is the growing material. You want to use growing media that you can pasteurize well instead of sterilizing. These growing materials have few nutrients. So, other organisms are less likely to attack them.
1. Straw
Straw is a great choice for mushroom growing material. It is cheap, easy to find, and good for types like oyster mushrooms. Straw's many fibers help air move and mycelium grow through it. Pasteurizing straw with hot water is fast and works well. This makes it good for simple setups.
2. Coco Coir
Coco coir comes from coconut husks. It is another good growing material, especially when mixed with vermiculite. It holds water very well. And it fights contamination because it has fewer nutrients. People often use it with BRF (brown rice flour) cakes. It is also very popular in monotub grows.
3. Hardwood Sawdust or Pellets
This is a main material for mushrooms that like wood, like shiitake and lion’s mane. You can add water to hardwood fuel pellets and pasteurize them easily in an oven. When mixed with wheat bran (this makes more mushrooms but raises the risk of contamination), these make strong fruiting blocks.
4. Spent Coffee Grounds
These are free, good for the planet, and full of nutrients. But coffee grounds attract molds easily. So, you must use them fresh, dry them, or pasteurize them. You get the best results when you mix them 1:1 with cardboard or straw. This helps air move better and lowers the risk of microbes.
5. Cardboard
Fungi can eat cardboard. You can pasteurize it with boiling water or just soak it in lime water. It gives you a material rich in cellulose that resists mold. This is a good choice for growing outdoors or for trying new things.

Pasteurization vs. Sterilization: How They Are Different
Knowing the difference between pasteurization and sterilization is important for growing mushrooms with simple tools.
Sterilization is a full process that kills all living things. People usually do it with autoclaves or pressure cookers. It is needed for grain spawn and most growing materials rich in nutrients.
Pasteurization, on the other hand, cuts down microbes but does not kill all of them. This means putting the growing material through controlled heat, pH changes, or chemical treatments. This process stops bad organisms. It also keeps good ones that do not get in the way of mushroom growth.
- 🌡️ Heat pasteurization: Heat (160–170°F) used with boiling water, ovens, or steam.
- ⚗️ Chemical pasteurization: Uses lime or hydrogen peroxide to change the growing material's pH. This stops bad microbes.
Pasteurization is easier to do. And it is a good start for beginners who want to grow mushrooms without pressure cookers.

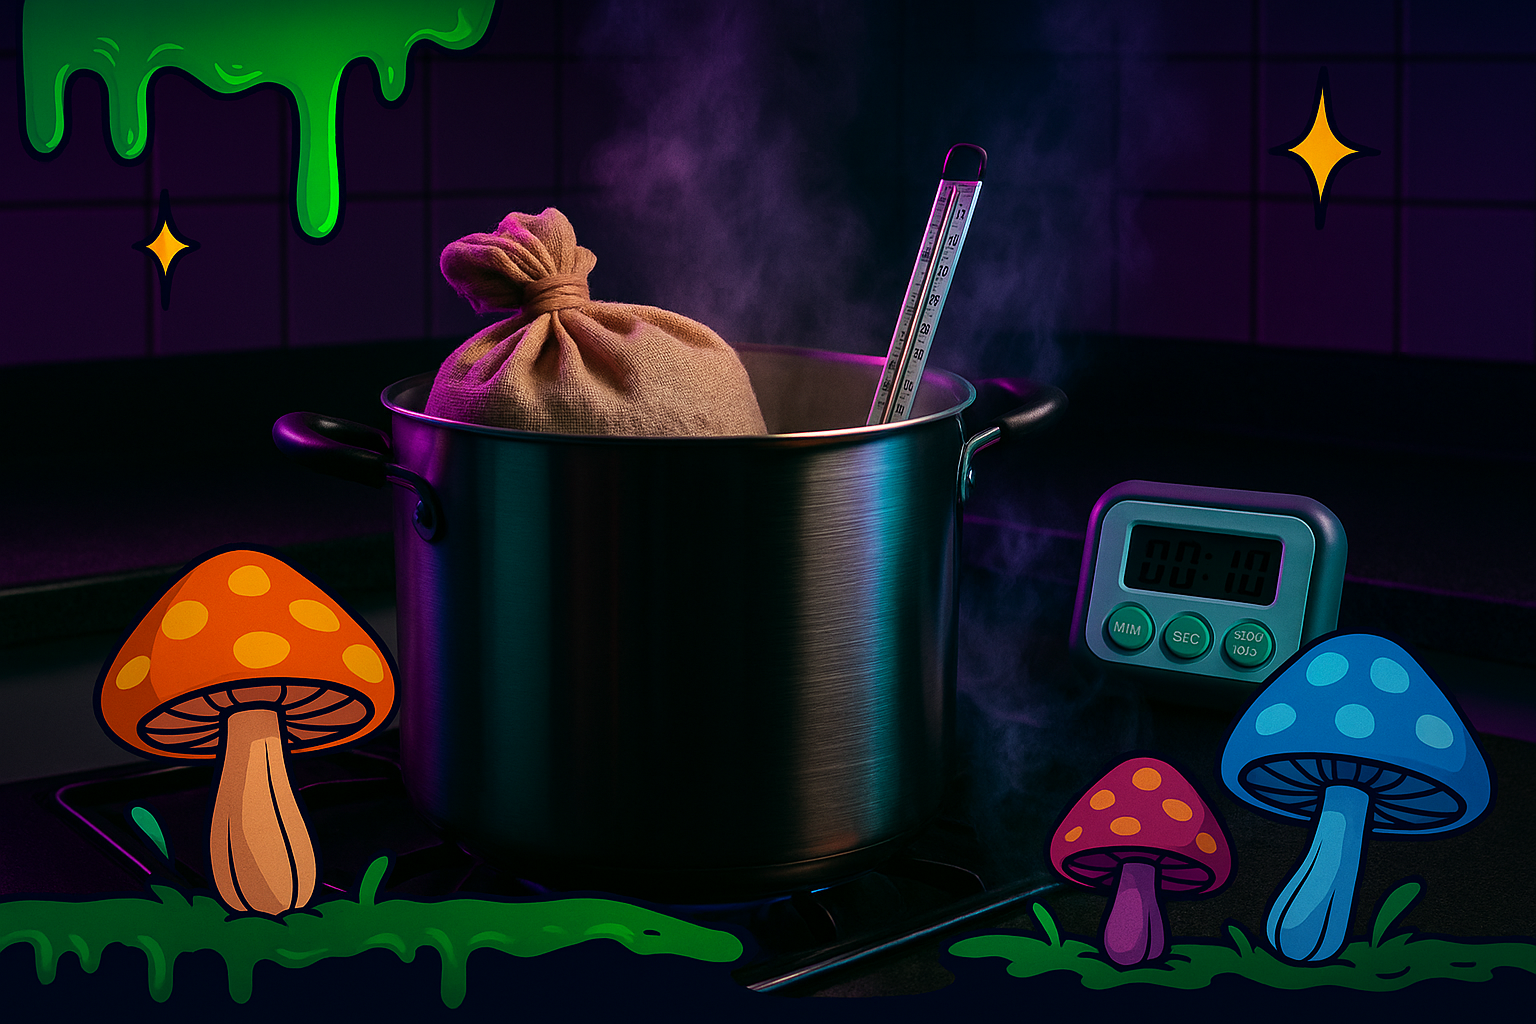
Hot Water Pasteurization: The Bucket Method
The bucket method is simple, works well, and is easy to use. It is what many DIY growers choose.
What You Need:
- Shredded straw or coco coir
- Boiling water (160–170°F or 70–75°C)
- Thermometer
- 5-gallon bucket with a lid or an insulated container
- Gloves for handling hot material
How to Do It:
- Soak the growing material in the bucket with boiling water.
- Make sure the water fully covers the growing material. Use a weight if you need to.
- Keep the temperature in the right range for 60–90 minutes.
- Let it cool. And then drain extra water before you add the mushroom spawn.
Myers (2020) found that this method keeps over 75% of the mushrooms you would get with full sterilization. This makes it great for oyster mushrooms and similar types.

Oven Pasteurization for Wood Growing Material
Many indoor growers like oven pasteurization because it is easy and exact.
How to Do It:
- Mix your moist growing material (like sawdust and bran mix) into foil trays.
- Cover it tightly with foil to keep moisture in.
- Bake at 160–170°F (71–75°C) for 1.5–2 hours.
- Let it cool completely before you add the mushroom spawn.
This way works best for small amounts. It also works well for growing materials like hardwood pellets or fine wood chips. People often use these for edible and medicinal mushrooms like lion’s mane or shiitake.

Cold Pasteurization: Using Hydrated Lime
Using hydrated lime for chemical pasteurization needs no energy. This method changes the growing material's pH. It kills most bad microbes.
What You Need:
- High-calcium hydrated lime (with no extra stuff)
- Clean water
- A tote or bin that won't react with lime
- Gloves, goggles, and a stirring stick for safety
How to Do It:
- Mix 10g lime for each liter of water (or 1% of the weight).
- Put growing material like straw or cardboard into the mix.
- Stir it now and then for 3–4 hours.
- Rinse and drain until the growing material is damp but not wet.
The high pH stops bacteria from growing. It leaves the cellulose good for fungi. Rinehart's 2019 study showed a 60% cut in contamination when using this method on plain straw.
⚠️ Always use the right safety gear when you work with lime. Strong chemicals can burn skin and eyes.

Making Grain Spawn Without a Pressure Cooker
Grain spawn is hard to make. It has many nutrients and can easily get contaminated. But you can still make small amounts using steam heat:
How to Do It:
- Soak grain (like oats or rye) for 12–24 hours.
- Cook it gently in water for 10–15 minutes.
- Drain and dry it so there is very little water on the surface.
- Steam it for 90–120 minutes in a lidded pot. Use a stand inside the pot so the grain does not touch the water.
- Move it to clean jars or bags. And then add the mushroom spawn only after it is fully cool.
This method does not work as well as pressure sterilization. So, it is best to use fast-growing mycelium like oysters. Or you can add pasteurized growing materials.

Steam Sterilization with a Pot
If you are not ready to buy a pressure cooker but want some sterilization:
How to Do It:
- Put jars or bags on a metal rack inside a large pot.
- Add enough water for steam, but do not cover the jars or bags.
- Cover loosely and steam for 1.5–2 hours.
- Watch the water levels carefully. This will stop things from burning or drying out.
This will not kill very tough spores. But it can make grain or high-nutrient growing material "cleaner" for short projects.

Using Spent Coffee Grounds as Growing Material
Spent coffee grounds are easy to get from home brewers, cafes, and restaurants. They have a lot of nitrogen, which mushrooms like. But bacteria like it too.
How to Use Them Well:
- Collect them when they are fresh. And spread them thin to dry.
- Mix them equally with low-nutrient material like straw or cardboard.
- Pasteurize them with lime or hot water. This stops bacteria from growing too much.
- Put them into clean bags. Make sure the moisture is right. And then add the mushroom spawn.
This growing material works best for oyster mushrooms. These grow fast and stop other microbes.

Good Mushroom Types to Grow Without a Pressure Cooker
Some mushrooms grow better in pasteurized or partly clean places. This is because their mycelium grows fast and competes well.
| Mushroom | Growing Material | How Easy to Grow | Best Method |
|---|---|---|---|
| Oyster | Straw, coffee, coir | Very easy | Bucket method, lime |
| King Oyster | Sawdust, coir | Medium | Oven pasteurization |
| Shiitake | Hardwood, sawdust | Medium | Oven, steam setup |
| Wine Cap (Stropharia) | Cardboard, straw | Easy | Outdoor/lime soak |
| Lion’s Mane | Sawdust, coir | Medium | Oven pasteurization |

Stopping Contamination in Simple Grow Setups
Even with less sterile ways, good cleaning and setup can stop most problems:
- Always clean tools, surfaces, and containers with 70% alcohol.
- Use a still air box or glove box when adding mushroom spawn.
- Wear gloves, a mask, and long sleeves.
- Close bags or jars tightly. And do not let them be open more than needed.
- Keep grow areas clean, with good airflow, and steady humidity.
Look for signs of contamination early. Green (Trichoderma), black (Aspergillus), or bad smells all mean microbes are growing. Throw out anything that looks wrong.

Products and Kits for New Growers Without a Pressure Cooker
For growers who want to skip getting things ready:
- Zombie Mushrooms Grow Kits: These are fully ready to fruit. They need no sterilization or growing material prep.
- Pre-Sterilized Grain Spawn Bags: Use these with liquid cultures or agar that has grown mycelium. No pressure cooker is needed.
- Liquid Culture Syringes: These are clean and easy to put into pasteurized or pre-sterilized growing materials.
These choices make things less complex. And they help new growers do well early.
FAQ: How to Sterilize Your Mushroom Substrate Without a Pressure Cooker
Q1: What substrates are easiest to sterilize without a pressure cooker?
Straw, coco coir, and cardboard are the most forgiving substrates because they are easy to pasteurize with hot water or lime. Coffee grounds can also be used, but they are more prone to contamination.
Q2: Can I just pour boiling water over my substrate?
Yes, pouring boiling water (often called “hot water pasteurization”) is an effective low-tech method for substrates like coco coir and straw. The heat kills most contaminants while leaving beneficial microbes intact.
Q3: How do I sterilize straw for mushrooms without a pressure cooker?
Chop the straw into small pieces, submerge it in 160–170°F (71–77°C) water for 60–90 minutes, then drain and cool it. This pasteurization process creates a safe environment for mycelium to colonize.
Q4: Is lime pasteurization safe for substrates?
Yes. Cold water lime pasteurization uses hydrated lime to raise pH, making the environment inhospitable to contaminants. It’s effective for straw and similar bulk substrates.
Q5: Why is coco coir popular for low-tech grows?
Coco coir is naturally resistant to contamination, easy to hydrate with boiling water, and widely available. Paired with vermiculite, it creates a balanced substrate that doesn’t require full sterilization.
Q6: Do I need to sterilize cardboard for oyster mushrooms?
Not usually. Oyster mushrooms aggressively colonize cardboard, and simple hot water soaking is usually enough to soften and clean the material before inoculation.
Q7: What’s the biggest risk of skipping a pressure cooker?
The main risk is contamination. While pasteurization methods reduce microbes, they don’t eliminate everything. That’s why choosing forgiving substrates and maintaining clean workflow practices is essential.
Final Thoughts: Start Growing Without the Pressure
You do not need expensive equipment to get into growing mushrooms. If you know how to grow mushrooms without a pressure cooker—using ways like pasteurization, clean handling, and strong types of mushrooms—you can easily start a rewarding hobby. Begin with oyster mushrooms and simple growing materials like straw or coir. As you get more confident, you can try steam sterilization for grains. Or you can buy pre-made kits to make learning easier.
Want to try it yourself? Look at our mushroom grow kits and pre-sterilized spawn bags to begin growing mushrooms without a pressure cooker.
References
Lincoff, G. (2015). The Complete Mushroom Hunter. Quarry Books.
Myers, D. (2020). Sustainable mushroom cultivation using household materials. Journal of Fungal Agriculture, 12(3), 223–230.
Rinehart, C. (2019). How well hydrated lime works for cold pasteurization of agricultural growing materials. Urban Mycology Studies, 7(1), 33–41.
Stamets, P. (2000). Growing gourmet and medicinal mushrooms. Ten Speed Press.

